Introduction to Building a Garden Wall
Imagine stepping into your backyard and finding the perfect balance between nature’s lush greenery and the refined elegance of a neatly constructed garden wall. Whether you want to define your property, enhance privacy, or add a touch of sophistication, learning how to build a garden wall with blocks can make a significant difference in the overall appeal of your outdoor space. In this comprehensive guide, we will take you through the step-by-step process of building a stunning garden wall using blocks.
Building an attractive and durable garden wall with blocks is not as complicated as it may seem, especially if you follow systematic instructions and pay attention to details. It is a project that can be done over the weekend with basic tools and materials. How to build garden wall with blocks? The answer lies in combining practical techniques with creativity to create a structure that mirrors your style while complementing your landscape.
The beauty of building a garden wall from blocks is that it provides freedom to customize according to individual preferences. You can select from various designs, sizes, and colors of blocks available in the market. Besides its visually pleasing aspect, using blocks for your garden wall offers strength and durability, ensuring your wall stands strong against weather elements.
This guide will provide you with expert tips, techniques, and safety measures required for a smooth construction process. Whether you’re a DIY enthusiast or a beginner seeking to challenge yourself with a new project, we are here to make the process easier for you.
We encourage you to roll up your sleeves, gather your tools and materials, and get ready to transform your backyard into an enchanting retreat. Let’s dive into the process of how to build a garden wall with blocks.
Essential Tools and Materials
The first step in understanding how to build garden wall with blocks is to become familiar with the essential tools and materials required. Building a garden wall is not an overly complicated task, but having the right tools and materials on hand can simplify the process and result in a more professional finish.
When it comes to materials, the primary requirement is the blocks themselves. You’ll want to choose a block that suits the aesthetic you’re aiming for in your garden. Concrete blocks are a popular choice due to their durability, ease of installation, and versatility in terms of color and texture options. The number of blocks you need will depend on the size and height of your wall; therefore, you should have a good idea of your design before purchasing.
In addition to the blocks, other necessary materials include mortar mix for binding the blocks together and making sure they stay firm and secure. You’ll also need sharp sand and cement for making the mix, along with clean water. If you plan on adding finishing touches like capstones or coping stones at the top of your wall, make sure these are included in your list.
As far as tools go, there are several key items you’ll need when learning how to build a garden wall with blocks. A cement mixer (although not entirely necessary if you’re prepared to mix by hand), a wheelbarrow for moving your mixed mortar around, a brick trowel for applying mortar to the blocks and a tape measure for ensuring your blocks are evenly spaced are all essential tools for this project.
Other useful tools include a spirit level to ensure your wall is straight both horizontally and vertically; a hammer and chisel for cutting blocks if necessary; a jointing tool for finishing off the mortar joints once they’ve started to set; safety glasses and gloves for protection and a soft brush for cleaning off excess mortar.
Lastly, don’t overlook the importance of a good set of building plans or instructions. Having a clear guide to follow can make the process go much more smoothly and reduce the chances of mistakes.
Building a garden wall with blocks can be a fun DIY project that not only enhances your garden but also adds value to your property. With the right tools and materials, anyone can create a sturdy and attractive garden wall.
Choosing the Right Type of Blocks
One of the most crucial steps in learning how to build a garden wall with blocks is choosing the right type of blocks. These will serve as the foundation of your garden wall and determine its durability, strength, and aesthetic appeal. With a variety of types of blocks available in the market, picking the right one may seem daunting. However, understanding their features and functionalities can simplify this task.
The first type of block to consider is the retainer wall block. Known for their interlocking design and sturdy structure, these are perfect for creating strong, durable walls that can withstand pressure from soil and water runoff. They also come in various colors and finishes that can enhance the look of your garden.
Another type to consider is the cinder block. This is an economical option ideal for those working with a tighter budget. Despite their affordability, cinder blocks are quite durable and can effectively resist elements such as wind and rain.
Concrete blocks are another strong option to consider. They offer excellent durability and versatility as they can be filled with reinforcing materials for additional strength. However, keep in mind that they may not offer as much visual appeal as other types of blocks.
In contrast, if aesthetics are your primary concern then decorative concrete or stone blocks would be an ideal choice. While these may be a bit more expensive than other options, they can significantly enhance the beauty of your garden wall with their natural textures and colors.
There’s also the option of using hollow blocks which are usually lighter than solid ones making them easier to handle and install. These can be filled with concrete or steel bars for added strength.
When learning how to build a garden wall with blocks, remember to consider factors beyond just cost. Look at aspects such as ease of installation, maintenance required, durability under local climate conditions, aesthetics, and compatibility with your garden’s overall design. It’s also advisable to seek the advice of a professional to ensure that you’re making the right choice.
With the right type of blocks, your garden wall can serve as an attractive and functional addition to your outdoor space for years to come.
Planning Your Garden Wall Design
Before you can start the actual building process of your garden wall, the first crucial step is planning your garden wall design. This planning phase dictates how the wall will fit into your outdoor space and serve its intended purpose. Also, it helps in determining the style, size, and overall appearance of your garden wall. Therefore, learning ‘how to build garden wall with blocks’ starts with thoughtful planning and design.
Firstly, consider the purpose of your wall. Are you building it for privacy, to define a property line, or to support plantings? Maybe you need it for aesthetic appeal to add structure to your garden landscape? The purpose will impact the design and placement of your garden wall.
Once you’ve determined the purpose, decide on the location where it should be built. Think about how it will affect the existing layout of your yard and whether it may obstruct views or access routes. Also, keep an eye out for any utilities that might be affected by its construction.
The next step is to decide on the size and style of the wall. This will depend on your personal preferences, as well as the overall design of your garden. You must consider both the height and length of your garden wall – remember that higher walls may require additional reinforcement to ensure stability.
Your choice of materials is also essential in this planning stage. Blocks come in a variety of shapes, sizes, colors, and textures; hence you have plenty of options to choose from. Do you envisage a rustic stone look or a sleek modern finish? Ensure that whatever block you choose complements the existing aesthetics of your garden.
Finally, sketch out a rough plan detailing where you want to place each block which will help guide you when you start building.
The planning stage might take some time but remember that a well-planned garden wall will not only enhance the beauty of your garden but also add value to your property. So, it’s quite worth the effort to plan before you dive into ‘how to build garden wall with blocks’.
Up next, we’ll look at how to gather your materials and get started with building your garden wall. Stay tuned!
Preparing the Ground for Construction
Before diving into the specifics of ‘how to build a garden wall with blocks’, it’s vital to begin by preparing the ground for construction. This preliminary step is crucial for ensuring the stability and longevity of your garden wall.
The first thing you’ll need to do is determine the location and layout of your wall. Take into account the natural landscape, any existing structures, and how the wall will fit into your overall garden design. Once you’ve decided on the layout, mark out the area using wooden stakes and string or a landscaping spray paint.
Next, you’ll need to excavate the site. The depth of your excavation will depend on several factors, including the height of your wall and the type of soil in your garden. As a general rule, you should dig a trench that is at least a few inches deeper than the first layer of blocks. This base layer provides extra support and stability for your wall.
After digging, it’s time to start leveling and compacting the soil in the trench. Use a builder’s level or laser leveler to ensure that the surface is completely flat – this is essential for building a sturdy, straight wall. If there are any high spots or bumps, remove them with a shovel or pickaxe.
Compacting is equally important because it makes the ground more resistant to erosion and helps prevent settling over time. A hand tamper works well for small areas, but for larger projects, you might want to consider renting a plate compactor.
Once the ground is level and compacted, you’ll need to add a layer of paver base or gravel. This helps with drainage and provides a smooth, stable surface for your block wall. Again, use your leveler to ensure this layer is perfectly even before moving on to laying your blocks.
By taking the time to properly prepare the ground, you’re setting yourself up for success as you move forward with learning how to build a garden wall with blocks. Remember that this base work is equally as important as the construction itself—after all, even the most beautifully designed garden wall won’t last long if it’s not built on a solid foundation!
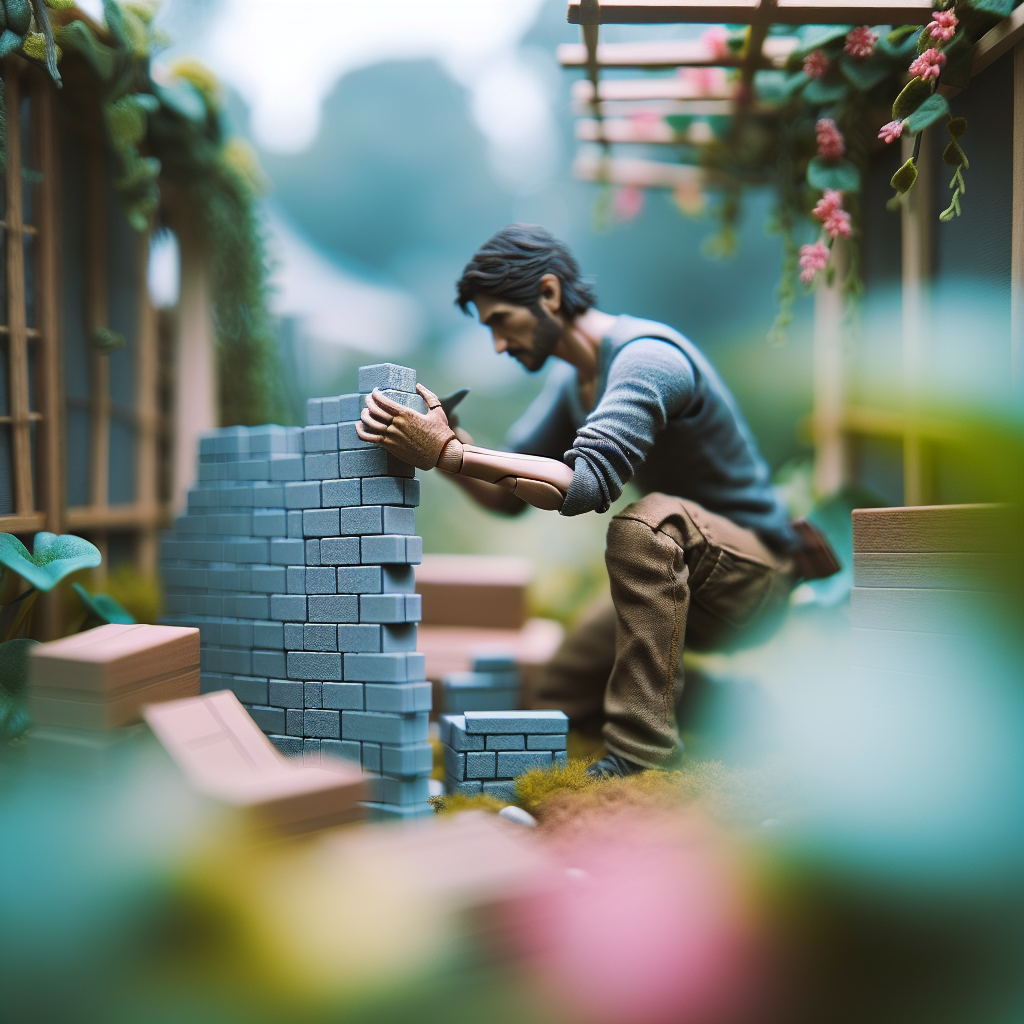
Laying the First Row of Blocks
Building a garden wall with blocks is a project that can significantly improve the aesthetics and functionality of your outdoor space. After selecting the right blocks, preparing the base, and gathering all necessary tools and materials, the next critical step involves laying the first row of blocks. This initial row serves as the foundation for your wall and determines its alignment, so it’s essential to get it right.
The process of laying the first row of blocks is fairly straightforward. Start by placing your corner block at one end of the wall base. Ensuring that this first block is level and correctly positioned is crucial because it sets the standard for all subsequent blocks. Use a level to check both the side-to-side and front-to-back alignment of the block. Make any necessary adjustments by adding or removing base material under the block.
Once you are satisfied with the positioning of your corner block, you can start laying the rest of the blocks along the length of your wall. Apply a layer of concrete adhesive to the bottom of each block before setting it in place next to the preceding block. Make sure that each block fits snugly against its neighbor and sits firmly on the base without wobbling or tilting. Use your level to maintain consistent height and linearity across all blocks.
Continue this process until you have laid all blocks for the first row. Keep checking your work as you go along; correcting mistakes becomes more difficult as you add more rows. It’s also important to remember to stagger the joints in each subsequent row to increase the strength and stability of your garden wall.
A common question we encounter is, ‘How to build garden wall with blocks that are uniformly leveled?’ The answer lies in patience and precision. Never rush through laying out your first row; take time to ensure each block is perfectly leveled before moving onto the next one. This meticulousness will pay off in the end, resulting in a sturdy and attractive garden wall that you can be proud of.
In summary, laying the first row of blocks when building a garden wall is a step that requires careful attention to detail. By ensuring each block is level and properly adhered, you set the groundwork for a successful project. The key is to work slowly and methodically, always checking your work for consistency and accuracy.
Building Additional Layers of Blocks
Once you have laid out your first layer of blocks for your garden wall, it’s time to move on to the next step of our guide on ‘How to build a garden wall with blocks.’ This stage involves building additional layers of blocks. This task might seem daunting at first, but with patience and precision, you will gradually see your garden wall taking shape.
The process for adding subsequent layers mirrors that of the initial layer, with a few additional steps. Start by applying a layer of mortar on top of the first layer of blocks. The mortar acts as an adhesive, binding the blocks together and providing stability for your wall. You want to spread the mortar evenly across the block tops and keep it around three-quarters of an inch thick.
Next, place the first block of the second layer onto the mortar. Make sure that this block is centered over the seam between two blocks in the first layer. This staggering pattern increases strength and stability for your garden wall. Keep a level handy to ensure that each block is perfectly horizontal before proceeding to the next one.
Once all blocks are in place, use a trowel to remove any excess mortar that may have escaped from the sides. It’s key to complete this task while the mortar is still wet—making adjustments after it has dried can be challenging.
Repeat these steps for each subsequent layer until you reach your desired height for ‘How to build a garden wall with blocks.’ Remember not to rush through this process; taking your time during this stage will result in a more stable and visually pleasing garden wall.
One important note: as your wall gets taller, you might need to use a scaffold or ladder. If so, always prioritize safety by ensuring its stability before climbing on. Never overstretch when laying new blocks—moving safely and slowly up and down is crucial.
Building additional layers for your garden wall is a task that requires care and precision, but it’s also an opportunity to see your project come to life. So put on your safety goggles and gloves, roll up your sleeves, and get ready for some rewarding work!
Ensuring Stability and Safety of the Wall
One of the most crucial aspects when it comes to learning how to build a garden wall with blocks is ensuring the stability and safety of the wall. After all, a sturdy, well-built wall not only enhances the aesthetics of your garden but also provides functional benefits like privacy and protection. Here are some tips to ensure your block garden wall is both secure and safe.
Firstly, it’s important to start with a solid foundation. The strength and durability of your garden wall largely depend on its base. Excavate the ground to a suitable depth, typically about 6 inches more than the thickness of your first layer of blocks. Fill this area with a layer of compacted hardcore (crushed stone) followed by a layer of sand. This provides a strong, level base for your blocks, helping to ensure the stability of the wall.
Secondly, don’t underestimate the importance of drainage. Drainage plays a significant role in preventing destabilisation from water pressure build-up behind the wall. Incorporate weep holes into your design or use special blocks that allow water to escape. Backfilling the area behind your wall with free-draining material like gravel can also help prevent waterlogging and associated damage.
Thirdly, consider using interlocking blocks for additional stability. These blocks have special lugs that lock into each other, creating a stronger bond between layers and resulting in a more stable structure. Alternatively, you can use construction adhesive between each layer of blocks to hold them securely in place.
Next, remember to stagger the joints. This bricklaying method doesn’t just add visual interest to your wall; it also contributes to its strength and stability. Place each block over the joint between two blocks in the layer below so that all joints are offset, which will help distribute weight evenly across your garden wall.
Lastly, it’s important to check the stability and alignment of your wall frequently during construction. Use a spirit level after placing each block and adjust as necessary to ensure that your wall remains level and straight. This will prevent any unintended lean or curve in your final structure.
While these tips can significantly contribute to the stability and safety of your garden block wall, remember that larger or complex structures may require professional input. In such cases, it would be advisable to consult with a structural engineer to ensure the safety and longevity of your wall.
Finishing Touches for Your Garden Wall
Once you’ve completed the main construction steps of your project on how to build a garden wall with blocks, you can now focus on adding the finishing touches. This final step is all about enhancing the overall appearance of your wall and ensuring it’s durable and stands the test of time.
The first finishing touch to consider for your garden wall is the application of a protective sealant. This will protect your blocks from various weather conditions and moisture that could lead to deterioration or staining. Sealants are easy to apply, usually requiring just a brush or roller. You should ensure that the sealant is applied evenly over your wall, and that it’s completely dry before proceeding with any other finishing touches.
Next, consider landscaping around the base and top of your wall. This can help integrate the structure into your garden more naturally and give it an appealing aesthetic. Consider planting flowers or shrubs at the base of your wall to add some color and life. On top of your wall, you could add decorative stones or even install lighting fixtures. This not only adds extra security but also allows you to enjoy the beauty of your new garden wall even after sundown.
Additionally, think about incorporating some decorative elements into the wall itself. For instance, you can use different colored blocks to create patterns or designs that make your garden wall stand out. Adding a capstone or coping on top of your wall can also give it a more polished look while providing additional protection from rainwater.
Remember, building a garden wall isn’t just about functionality; it’s also an opportunity to enhance the beauty of your outdoor space. So take this chance to get creative! Whether you choose to add ornate detailing, bold colors, or subtle landscaping touches, these will all contribute towards making your garden wall a standout feature in your yard.
In conclusion, understanding how to build a garden wall with blocks is about more than just the construction process. It’s also about taking the time to add those finishing touches that give your wall character and longevity. Remember, your garden wall is a reflection of your style and creativity, so don’t be afraid to make it unique!
Maintaining Your Garden Wall
After you’ve mastered the art of how to build garden wall with blocks, it’s crucial to maintain your work to ensure its longevity. Your garden wall is not only a functional part of your outdoor space but also an aesthetic feature that adds value to your property. Therefore, regular maintenance should be a priority. Here we will discuss some handy tips for maintaining your garden wall.
Firstly, regular inspections are key. It’s important to check your wall periodically, looking for any signs of wear and tear, such as loose blocks or cracks. Early detection of these issues can prevent more serious damage and costly repairs in the future. Remember that harsh weather conditions such as heavy rain, strong winds or frost can affect the integrity of your wall, so pay extra attention after such periods.
Secondly, cleaning is another important aspect of maintenance. Dirt, moss and algae can build up on your garden wall over time, detracting from its appearance and potentially causing damage. You can use a soft brush and mild detergent to gently clean the blocks, or for tougher stains, a pressure washer could be used with caution. However, avoid using harsh chemicals which could erode the surface of the blocks.
Your garden wall might also have plants growing on or near it which need careful management. While plants can enhance the beauty of a garden wall, they can also cause damage if their roots grow into the wall or their foliage retains moisture against it. Regular pruning can help manage this issue.
If you notice any significant damage during your inspections – like large cracks or destabilisation – it’s best to call in a professional. They have the skills and knowledge to repair structural damage safely and effectively.
Lastly, consider sealing your garden wall. Applying a protective sealant can help protect against weathering and staining. It’s advisable to reapply the sealant every few years to ensure continued protection. Remember to choose a sealant that’s appropriate for the type of blocks you used in your garden wall.
In conclusion, maintaining your garden wall requires regular inspections, cleaning, and the occasional application of a protective sealant. By following these steps, your garden wall will remain an attractive and durable feature of your outdoor space for many years to come.
Conclusion
In conclusion, learning how to build a garden wall with blocks is not only an economical and practical solution for your landscaping needs, but it is also a project that boosts your home aesthetic appeal. Remember, the foundation of the whole project lies in the selection of the right blocks and appropriate preparation of your working area.
Starting from gathering the necessary materials and tools, marking your layout, digging the trench, laying down the first row of blocks, all the way to completing your wall with multiple rows and adding capstones; each step matters. It’s all about perfecting each process and making sure that it is done correctly.
However, even if this task may seem daunting at first, especially if you have never embarked on such a DIY project before, it is certainly achievable. The satisfaction derived from creating a beautiful structure that enhances your garden’s look by yourself cannot be understated. With patience and careful following of these instructions on how to build a garden wall with blocks, you can achieve professional results.
Moreover, building your own garden wall offers you the flexibility to customize it according to your preferences. You have control over everything from its height and length to its design and color scheme. This feature makes it more rewarding when you finally finish building it, knowing it reflects your personal taste.
Lastly, don’t forget safety during this process. Always wear protective gear, like gloves and safety glasses, when handling blocks or using power tools. Take breaks when needed and remember that building a wall isn’t a race — taking your time to do things right will pay off in the end with a sturdy, attractive addition to your garden.
In essence, our guide on ‘how to build a garden wall with blocks’ offers you an exciting opportunity to test out your DIY skills while saving costs. So why not give it a try? You might surprise yourself with what you can achieve.